As mentioned in previous posts, we love Cloudflare for our clients! And as part of our PRO plan, we can help manage your DNS as well when you add user to your Cloudflare account.
Since we want you to always have control over your domains and DNS, we recommend that you create your own Cloudflare account and then give us access.
Here are steps to complete that:
Step 1: Signup for a Free Cloudflare.com Account
Go to Cloudflare.com and signup for your account.
Step 2: Confirm your email address
You will receive an email to confirm your email address to make sure it’s you!
Step 3: Add your domain name
One of the first inputs will be to add your domain name. The system will automatically prefill information for you. You can accept whatever is pre-filled and continue as our team will review and confirm everything looks right before making any changes.
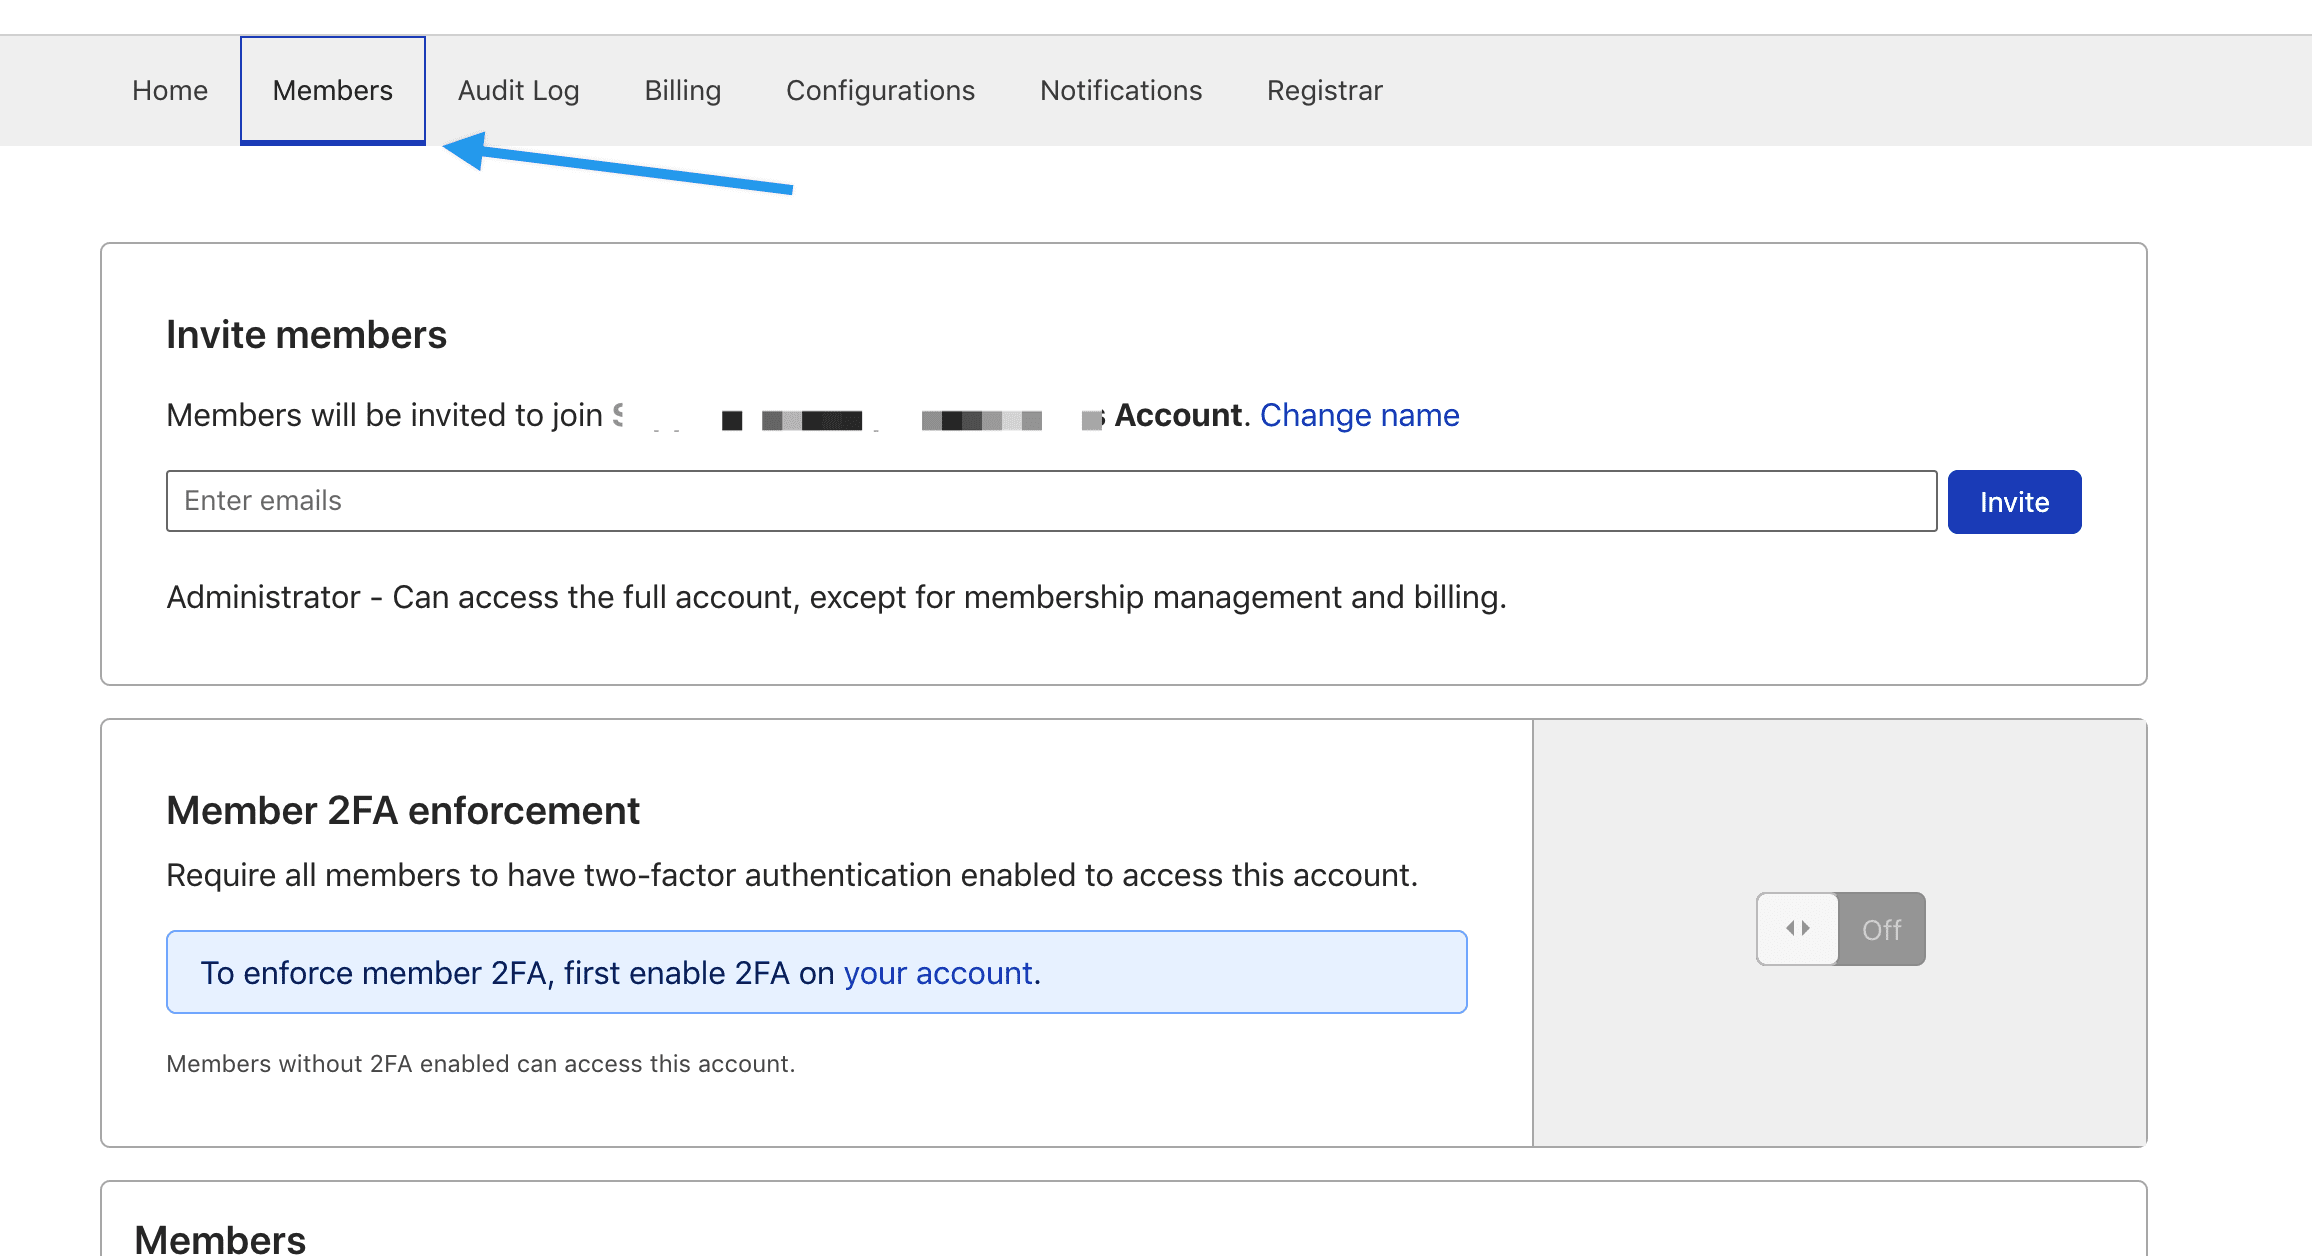
Step 4: Add user to your Cloudflare account
Click on the “Members” menu on the top. You will be prompted with an input box like below. Add our email address that is provided to you and hit “Invite”.
Step 5: We’ll take it from here!
After we receive the invite, we will make any necessary DNS updates and nameservers at your registrar when ready.
In summary, Cloudflare is an effective and free DNS tool that is recommended by WPBacked.com when you add user to your Cloudflare account.
If you need to chat, feel free to setup a consultation.